GiveSignup is excited to announce the launch of next-generation Email Marketing for peer-to-peer fundraising events and endurance events. Send unlimited emails, upload unlimited contacts, personalize email with custom and event replacement tags, and design beautiful emails with the new Email Builder. This first release contains a number of key features including:
- Free unlimited email sends
- Free unlimited email contacts
- Upload your contacts AND custom information
- Choose from default participant contact lists
- Design beautiful emails with the new Email Builder
- Personalize email communication with data replacement tags — and not just first name, last name, etc., but things like last year’s donation amount, links to photos, QR codes for checkin, etc.
GiveSignup’s Email Marketing is purpose built for your event’s marketing and participant communication strategy with all the power and capabilities of email marketing platforms like Mailchimp and Constant Contact. We have customers currently sending over 30 million emails per month for free on our platform, and we want to make a significant step forward in what we provide in our free platform. This release helps our customers cut email marketing costs by providing a free and integrated email marketing platform — with many more features and capabilities coming soon.
Clear and targeted communication with your event participants and fundraisers is key to any peer-to-peer fundraising event. If you are currently using V1 of Givesignup email marketing for your peer-to-peer fundraising event, your scheduled emails are still in Email Marketing, you can continue to create and send emails from Email Marketing, and you do not need to take any action. We plan to let directors use either or both Email Marketing options as we continue to add features like automated emails to Email Marketing V2.
This is a long blog that walks you through Email Marketing V2 features and functionality in registration. If you know what you’re looking for, you can jump to specific sections below.
Sent Emails
Templates
What’s Coming Next
Email Settings
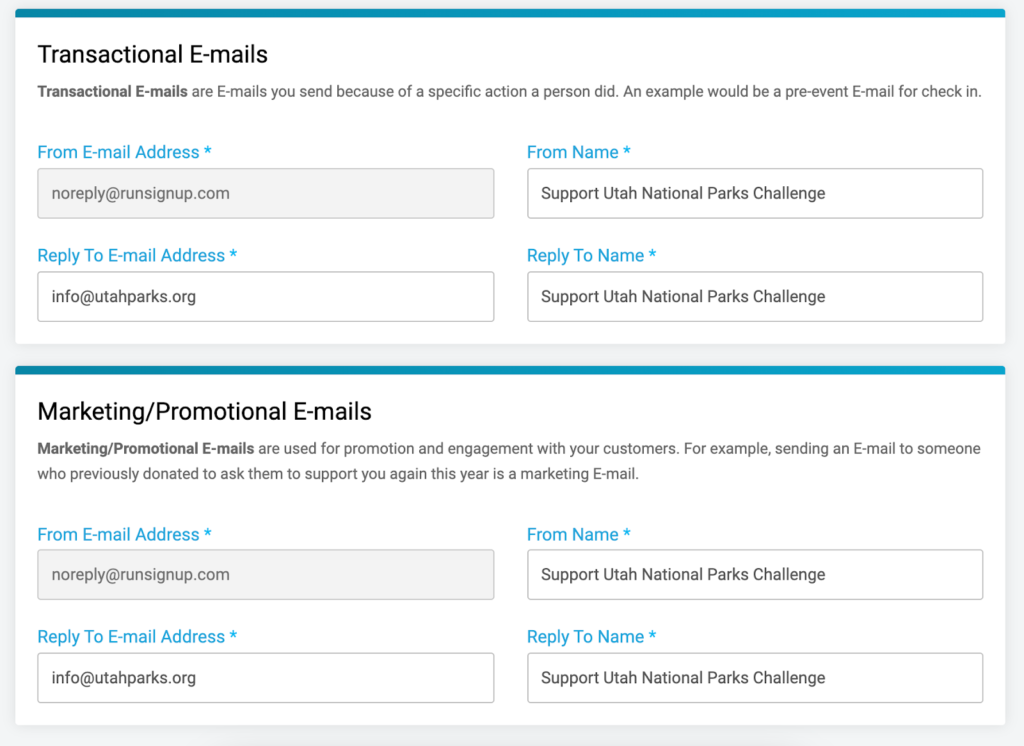
To begin using Email Marketing, navigate to the Email V2 tab in your Dashboard. Review and make any changes to the From and Reply To fields for Transactional and Marketing Emails. Click “Save” to confirm. Note that you must click “Save” to confirm these settings before sending emails.
Send Email
We make it free and easy for peer-to-peer fundraising events to send unlimited emails on GiveSignup. Our powerful contact lists let you send emails to contacts in GiveSignup and import unlimited contacts to custom lists. Powerful replacement tags for both system and custom lists let you personalize communication. Our new Email Builder makes it fun and easy to build beautiful emails in minutes!
Select Recipients
The first step of sending an email is to select recipients. There are two buckets of recipients:
- Default GiveSignup lists
- Custom lists
We’ll walk through selecting each of these types of contacts.
Default GiveSignup Lists
For the initial release, you can select from the following lists of recipients:
- All Current Participants
- Current Participants By Event (i.e., 5K, 10K)
- Past Participants By Year (i.e., All Participants, 2021; All Participants, 2019)
- Past Participants By Year and Event (i.e., 5K 2021 Participants)
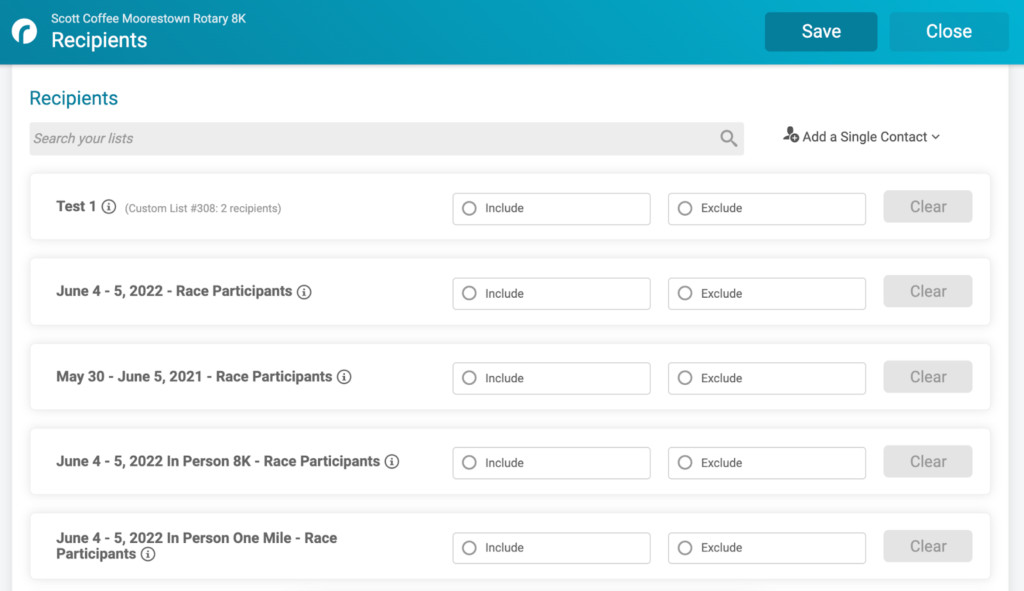
This page will also show any custom lists that you have uploaded (which we will review in the next section). Over the coming weeks, we will be improving the layout of this page to make finding and selecting default system and custom lists easier. For now, you can use the search at the top to quickly find the correct list(s) of recipients.
We will also be adding additional ways to create lists from GiveSignup. Later this week or next week, we will add the option to create a list from any report that you create from the Participants Report. For example, filter on deferred participants from last year’s race and export as a custom list to make your communication plan even easier.
Upload Custom Lists
One of the most powerful parts of GiveSignup’s Email Marketing platform is the ability to send unlimited emails to unlimited contacts. We make it free and easy to import as many contacts as you want, and powerful with the option to also import as many custom data replacement tags.
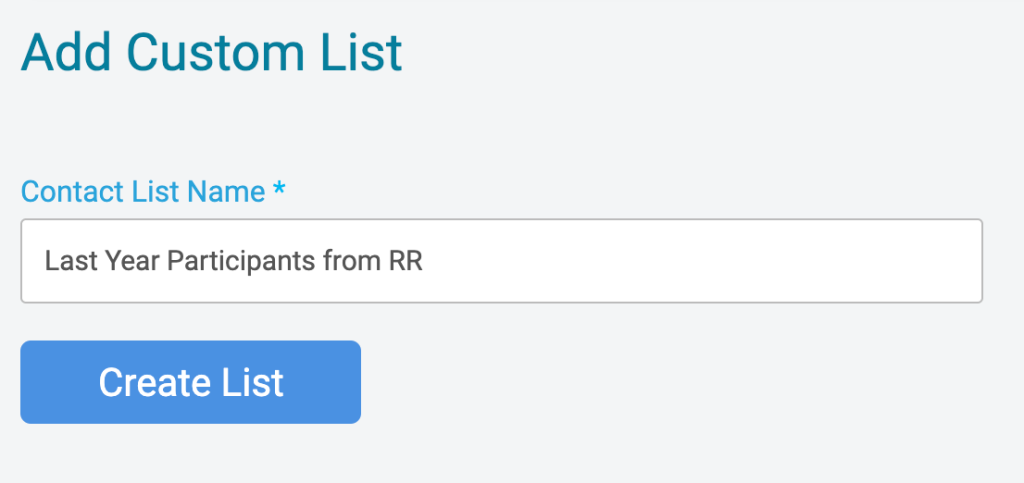
When creating a list, choose a name that makes it easy to identify the list when you select recipients.
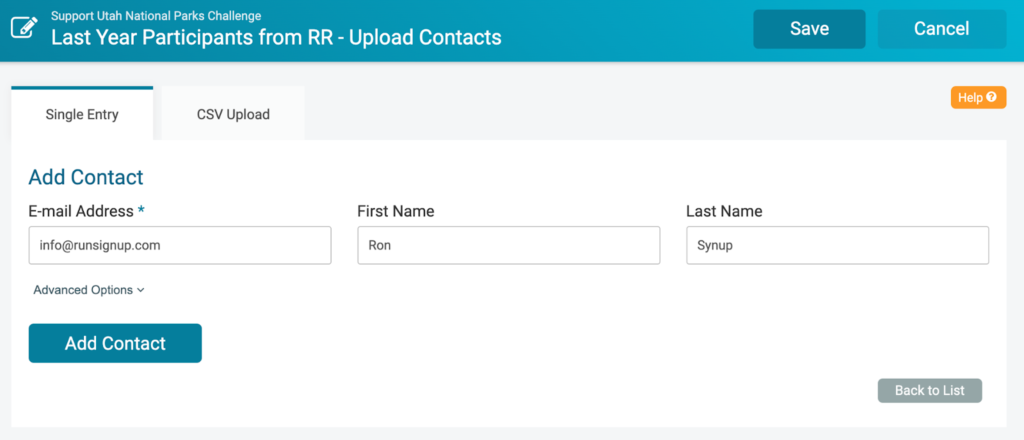
It’s simple and easy to manually add one or several contacts at a time.
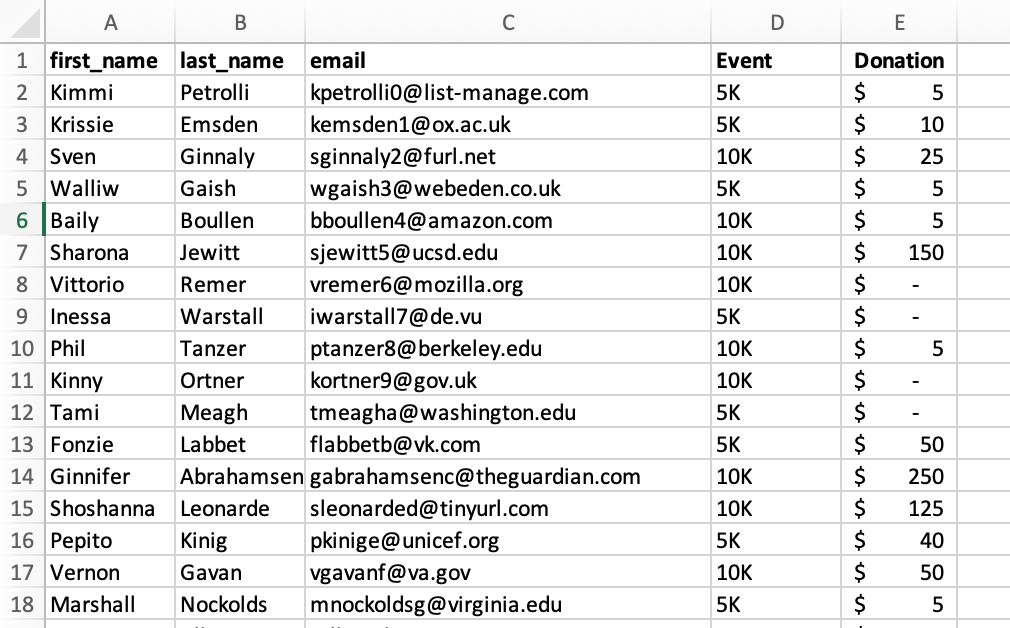
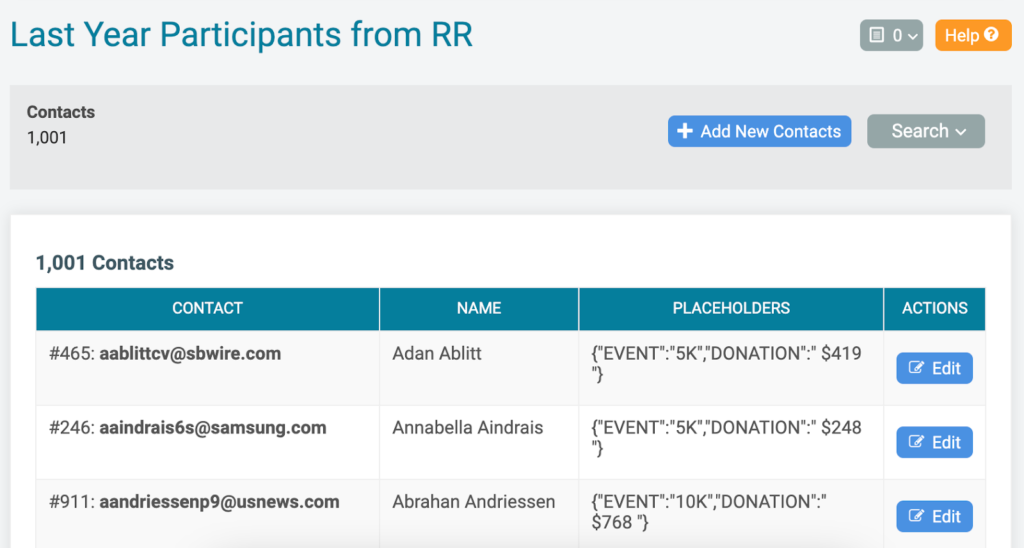
You can also upload a CSV of contacts. In the example below, the CSV file includes first name, last name, email, event, and donation. This will allow time to send a customized marketing email to invite these past participants from a different platform to register for this year’s race.
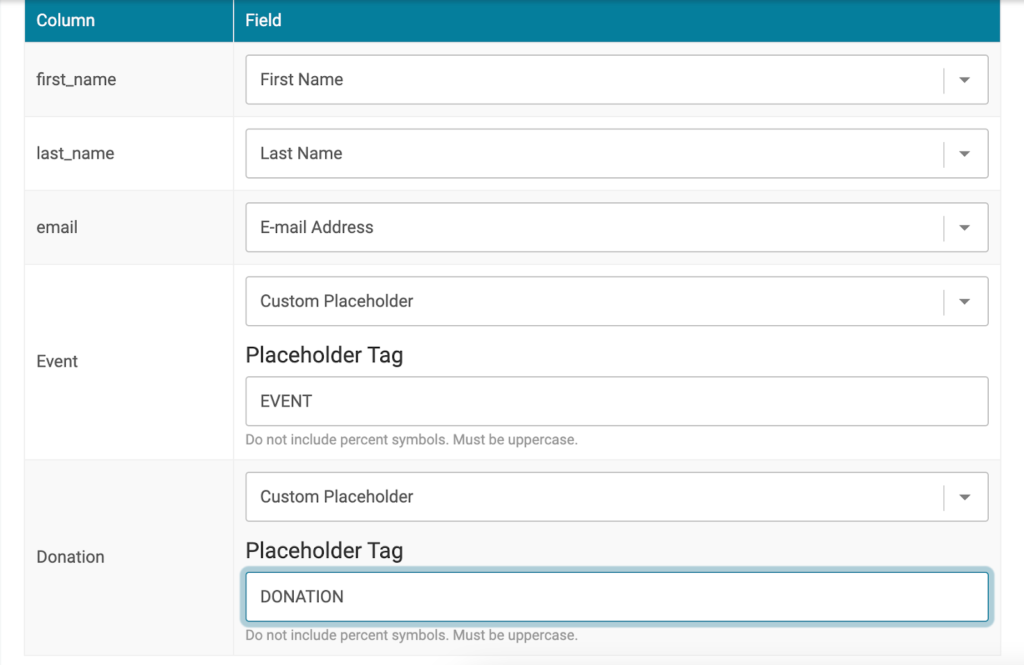
When uploading, columns will automatically match to default data fields. For data beyond name and email, you will have the option to create custom placeholders. These pull in a default name from the header row in your spreadsheet (if there is one), and you can customize to make it intuitive for you to recognize which data will show when using the custom replacement tag.
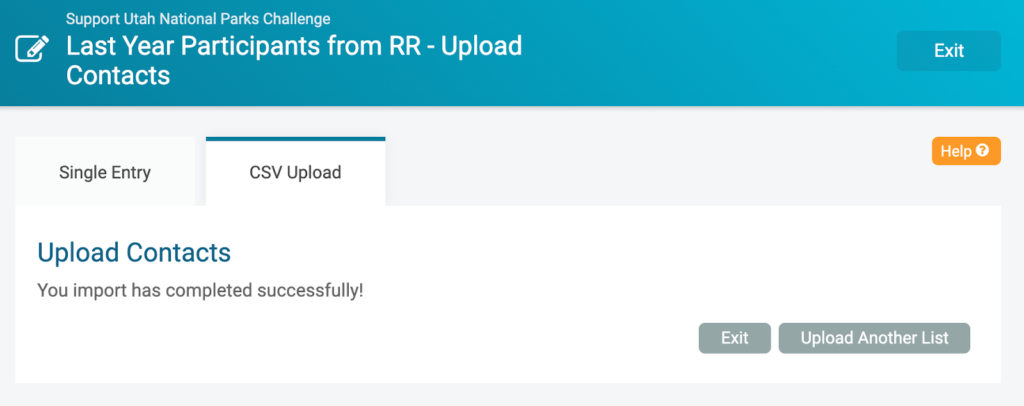
Click “Upload.” Depending on the size of your import, you may have to wait several seconds — do not refresh or exit the tab. Once your contacts have been added, you’ll receive a success message.
Note: We recommend keeping your lists to 100,000 contacts or less — so if you have hundreds of thousands of contacts, you will need to batch them (still free, no limits on number of contacts!). It’s easy to keep them all in the same custom list — just click “Add Contacts” on the custom list that you already created.
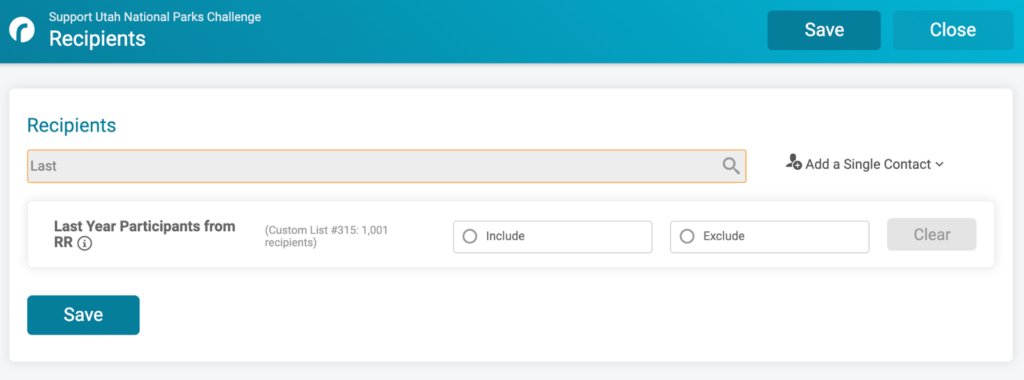
Now, it’s simple to choose that custom list when selecting recipients to send an email.
Email Builder
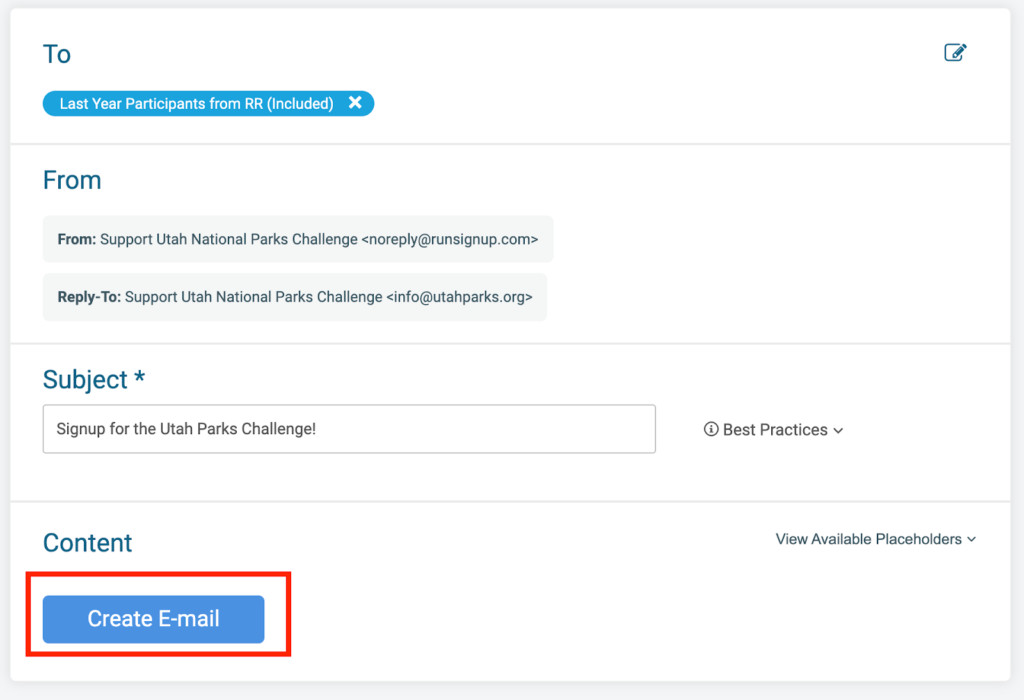
Now it’s time to create your email! Select “Create Email.”
This takes you into the new Email Builder where you can create or choose a design. Within the first tab, System Templates, you will choose between three options for creating your email:
- Start From Scratch
- Basic Template
- Use Your HTML
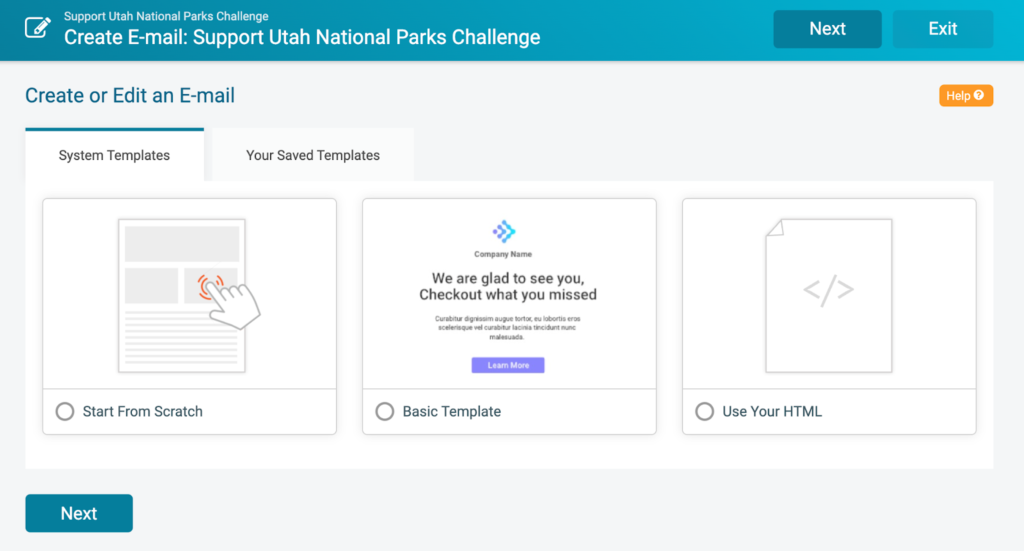
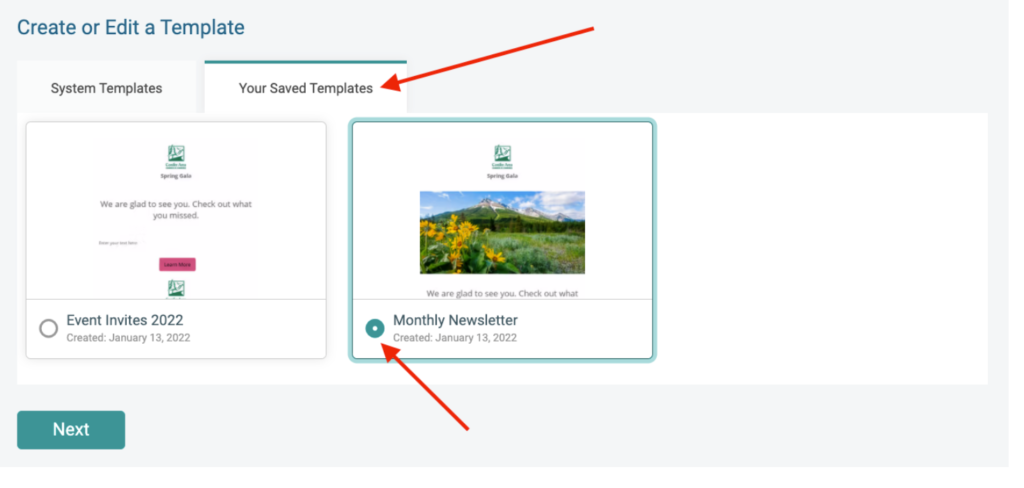
Note that there are two tabs on this screen: System Templates contains the three options above for creating an email and a second tab that will house your saved templates while Your Saved Templates houses your saved templates.
Start from Scratch
You will be taken to your email’s design board where you can add sections and content. Your board starts you out with the basics: theme, header, and footer. Between the header and footer is where you can start adding sections to display your content.
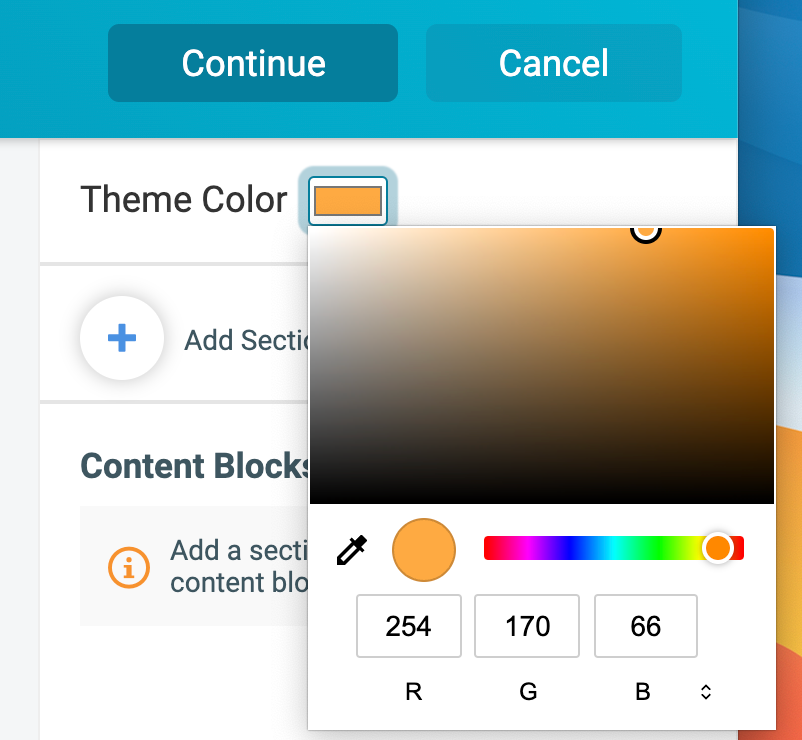
Your email template pulls in the primary theme color from your website so that there is consistency between your website and email communications. You can update the color by clicking and choosing a new option.
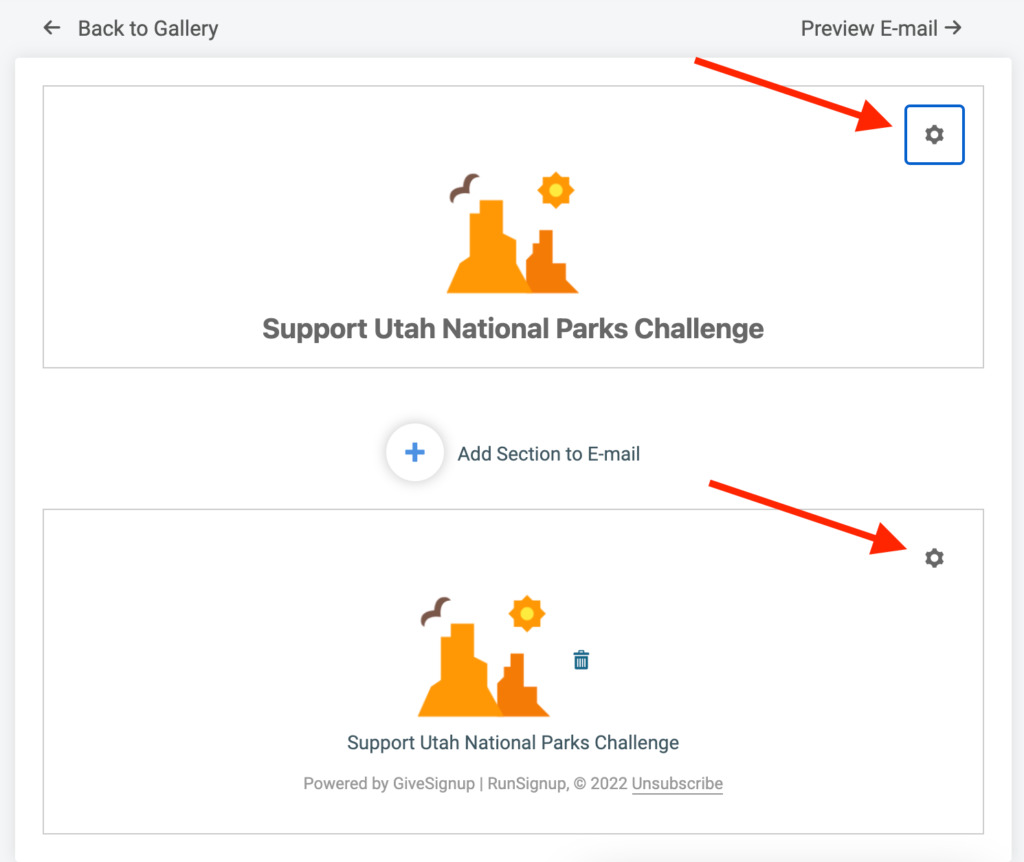
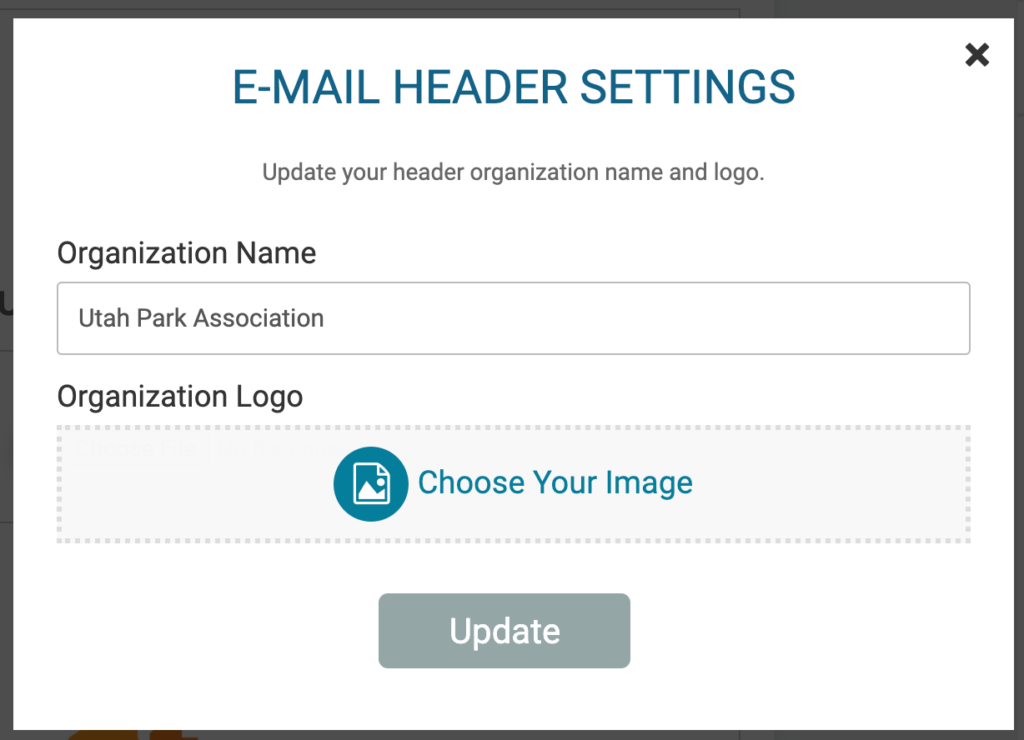
You can customize your email header and footer by clicking the gear button in the upper right-hand corner. Replace the logo and name. For example, while we default to your event’s logo and name, your organization may want to use your company or nonprofit logo/name instead.
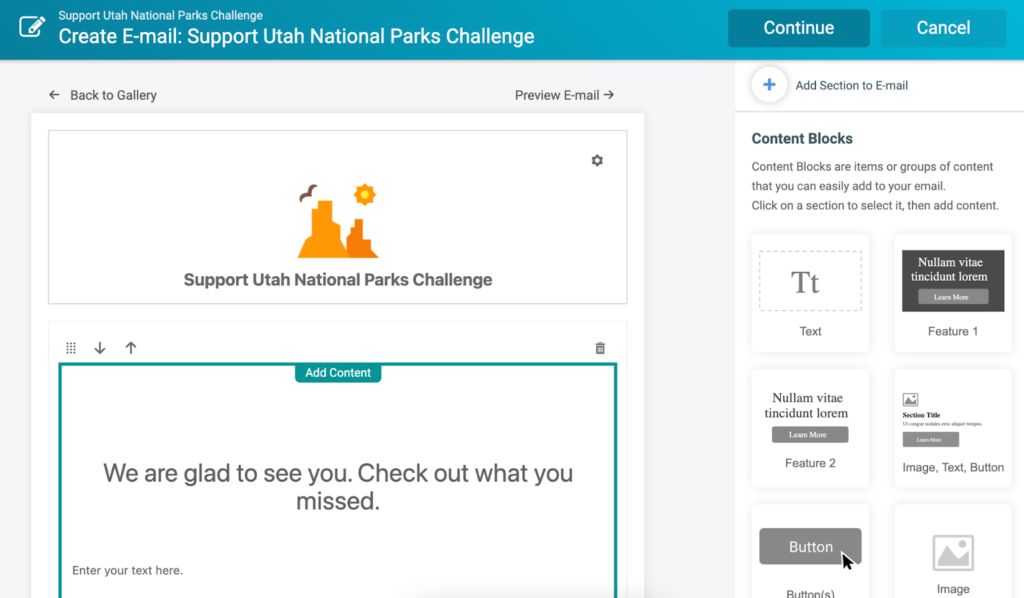
Get started adding content to your email by creating a section. There are one column and two column options.
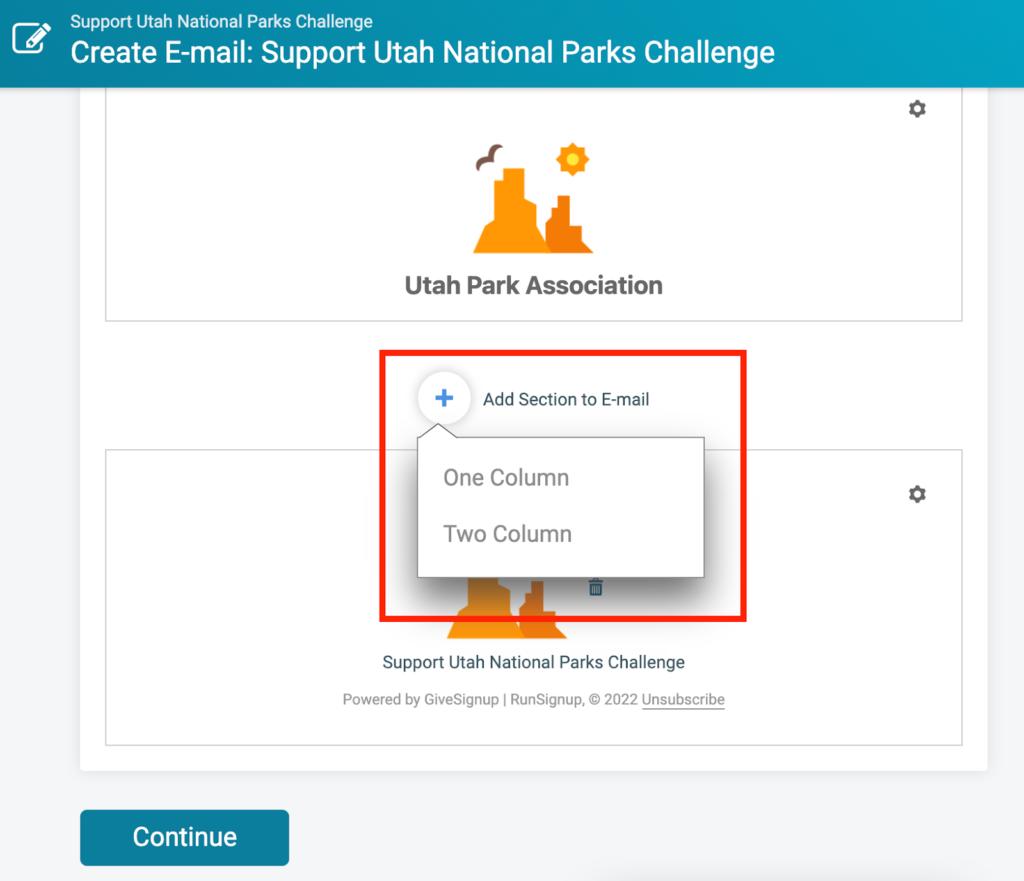
Then, choose your content type from the options provided. All content types can be utilized with a single or double-column section:
- Text
- Feature 1 (text + button, dark background)
- Feature 2 (text + button, white background)
- Image, text, button
- Button
- Image
You can add multiple content blocks per section. For example, add text, then add a button. Click on the plus symbol within the section to bring up the “Add Content” pop-up, or click on the type of content block you want inside of the sidebar on the right of your screen. You’ll notice that the section you are adding content to is framed for easy identification.
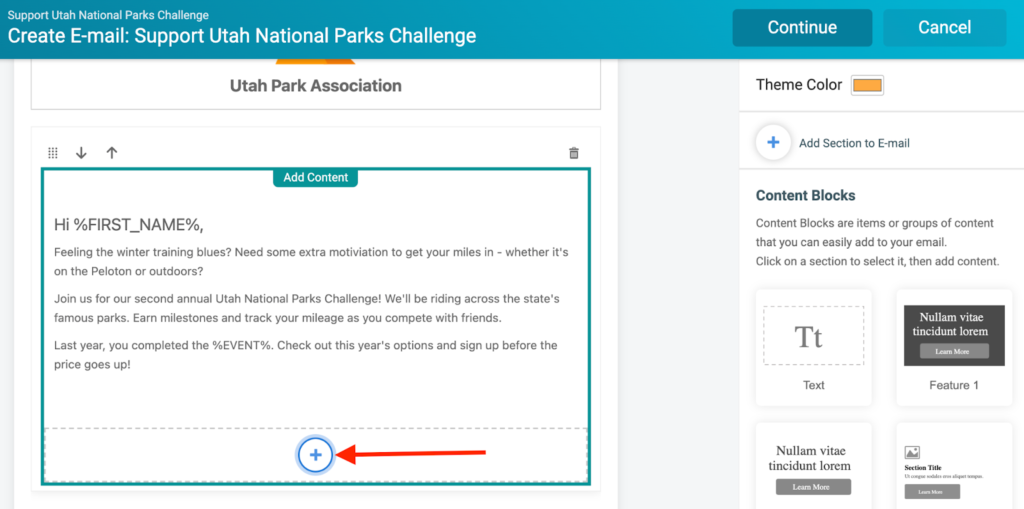
You can also click the plus button outside of the content block to add new sections.
Add Text
Text content blocks give you the ability to add text using our rich text editor.
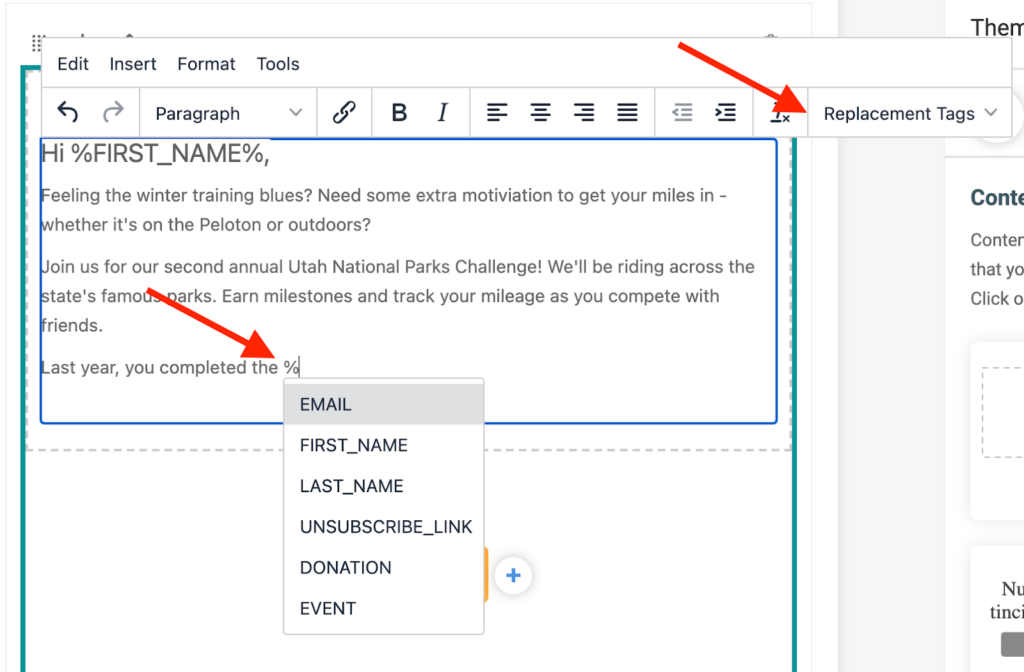
Use data replacement tags to personalize your emails and show your understanding and appreciation of your participant’s relationship with your event and organization. You can choose from the dropdown menu or just start typing a “%” and the full list will automatically appear — as you continue to type, the list of tags will narrow down to the one you are looking for. The above example is an email to the custom list of last year’s participants. You’ll see that the custom replacement tags uploaded appear as options.
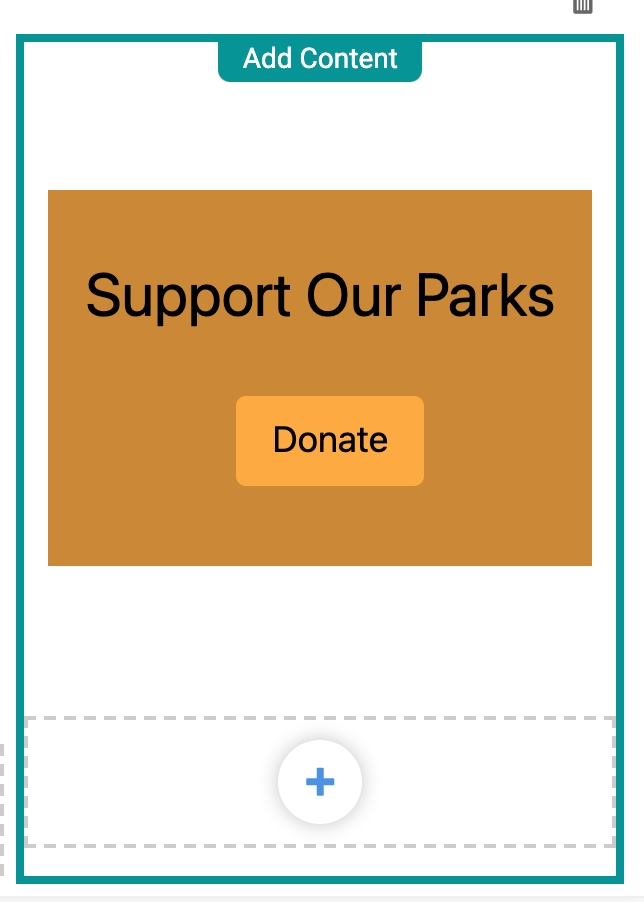
Add Feature 1 or 2 (Text + Button on Dark Background or White Background)
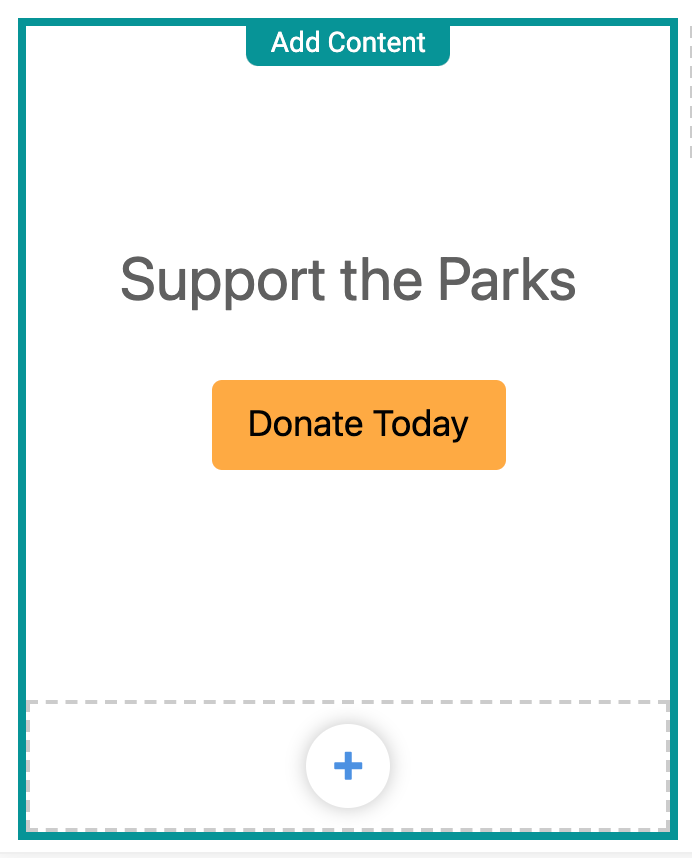
Features 1 and 2 allow you to group a text heading and action button together inside of a colorful or white box.
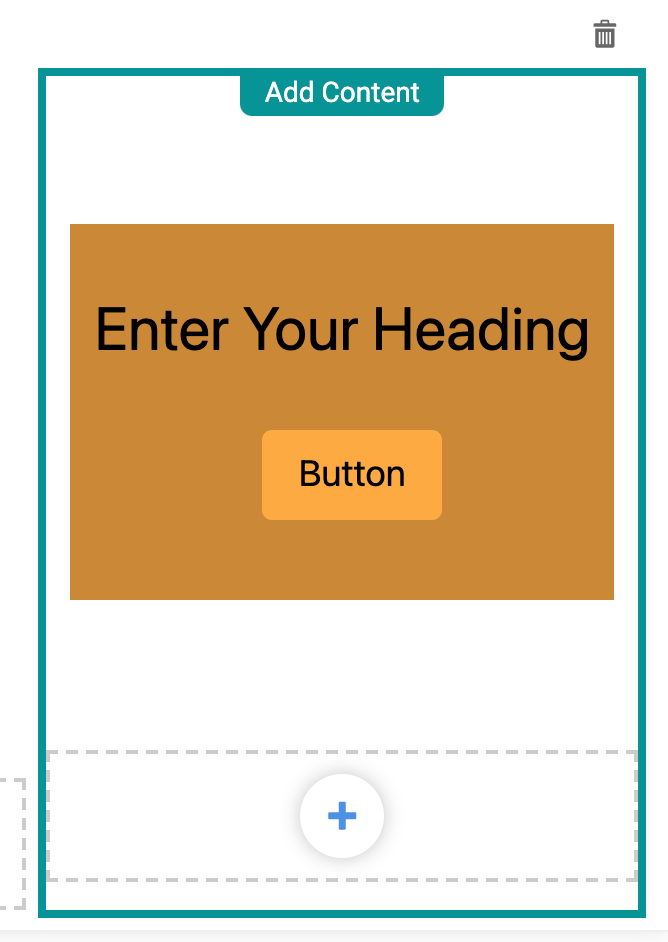
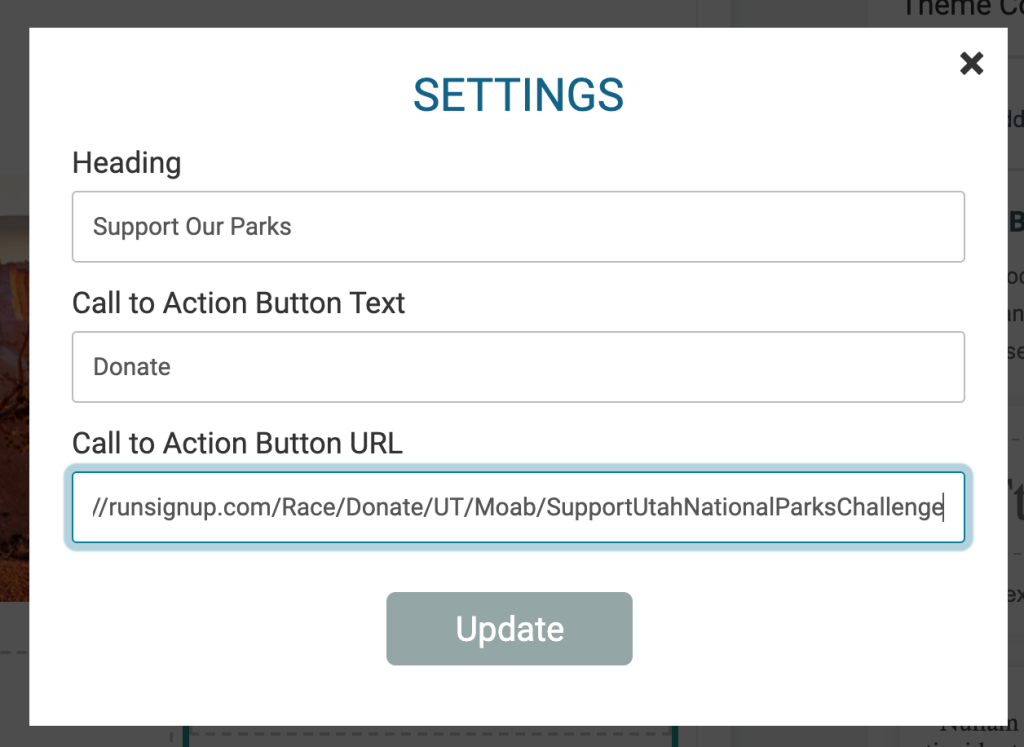
The heading text, call-to-action button text, and the call-to-action button URL can be updated here. Click the grey gear button to update the settings.
Or with a white background.
Image, Text, and Button
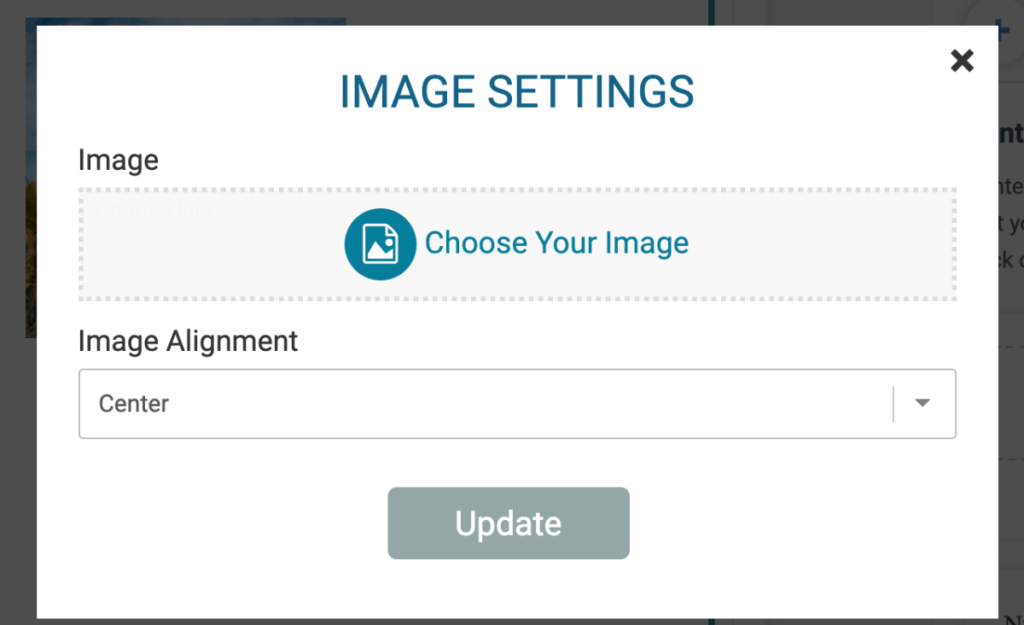
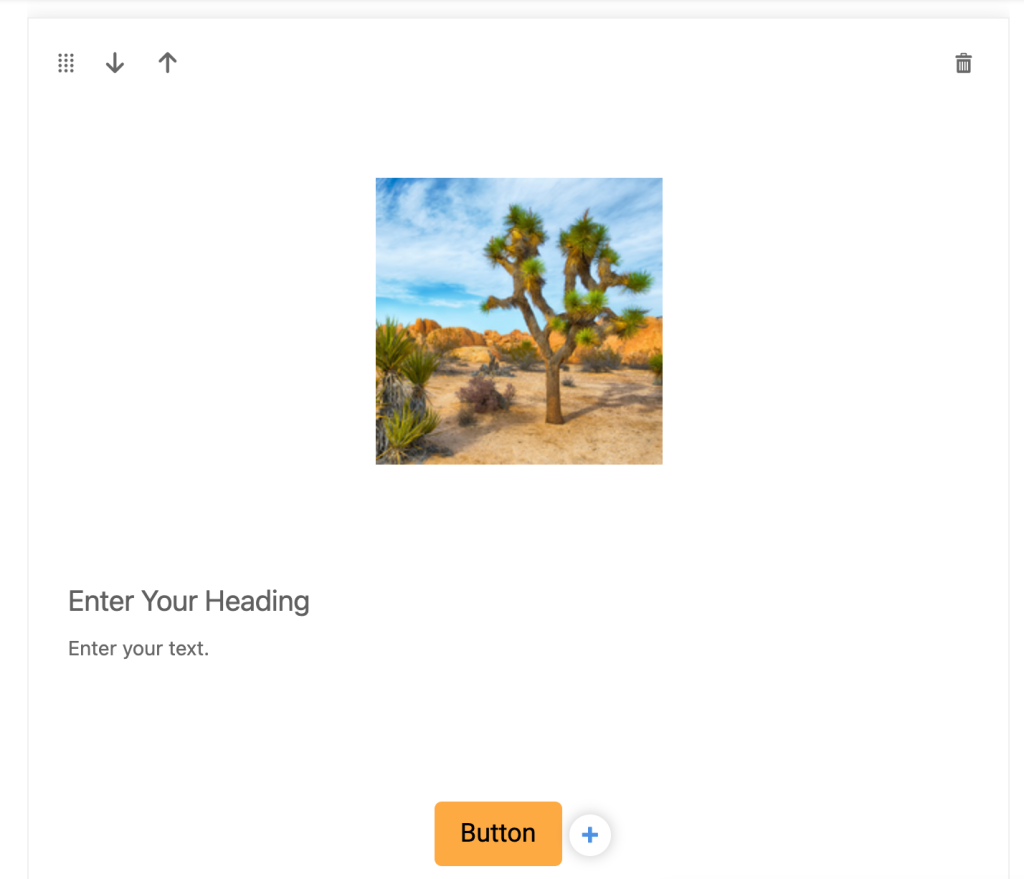
Image, text, and button content blocks allow you to organize three elements: an image, text, and action button together into one group. Upon adding, a pop-up will appear in which you will be prompted to choose your image and how you would like it to be displayed within the email (center or left).
Then add your text and format the button.
Buttons
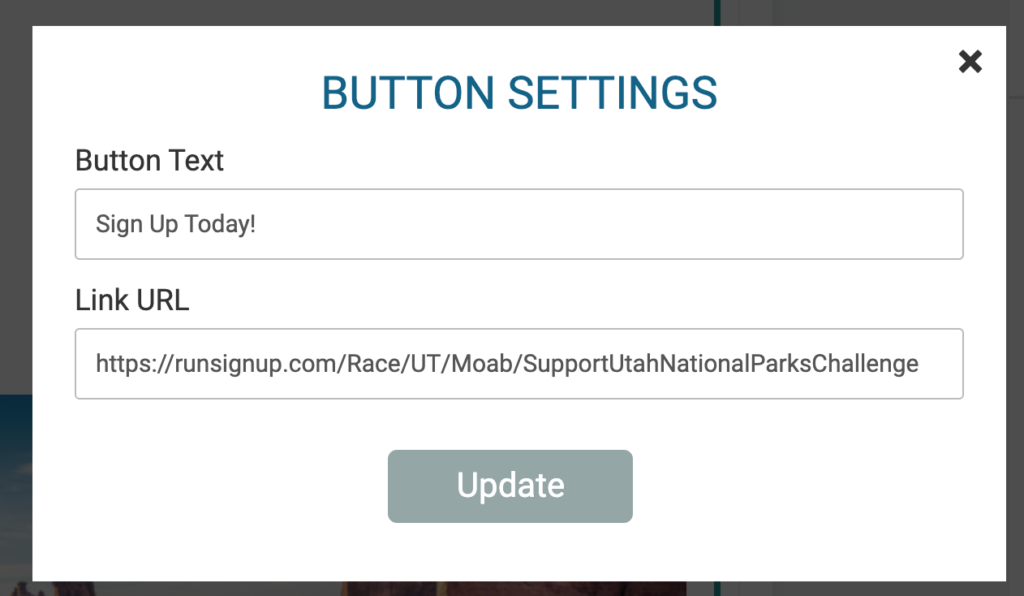
Adding and customizing buttons is simple. Click a button that you’ve added, and you’ll be able to customize the text and paste in a link where the button takes the email recipient.
Images
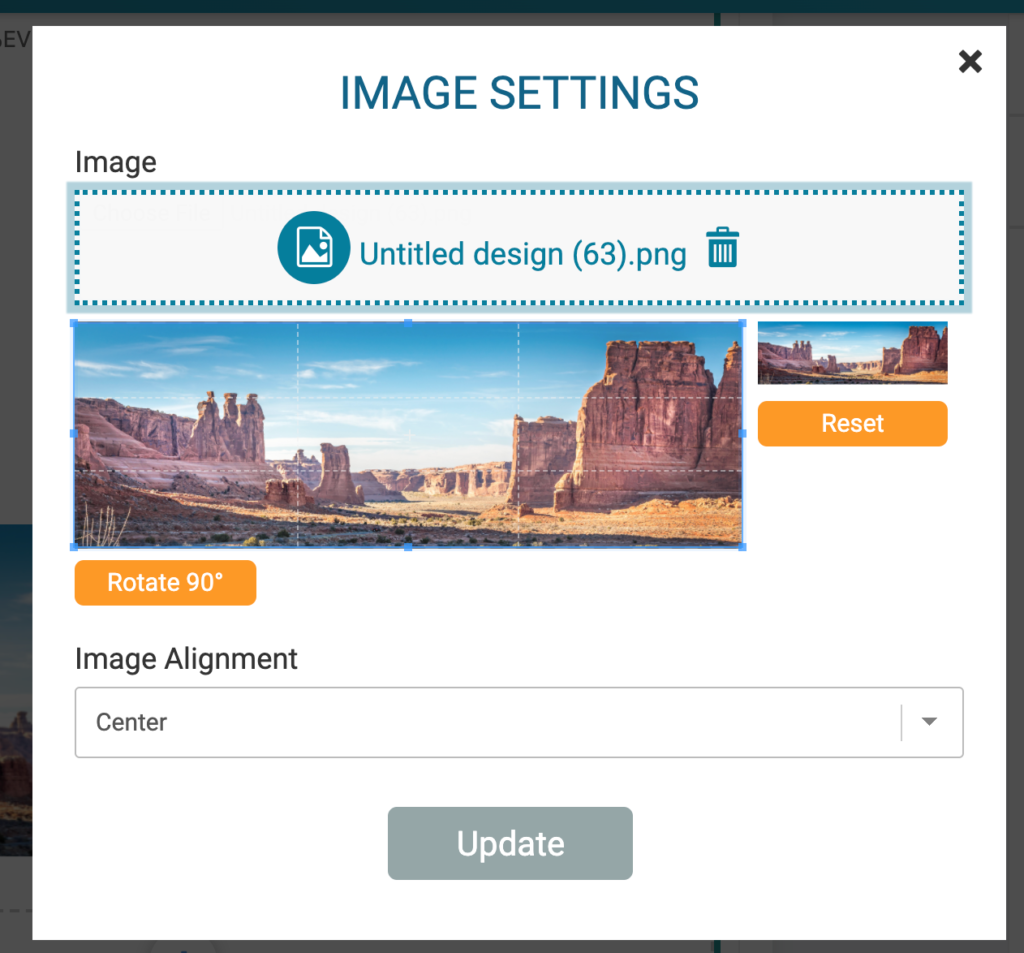
Image uploads are easy to drag and drop. Crop and rotate your image to make it fit in your email. Select alignment to control how your image displays in the email.
Arrange Sections
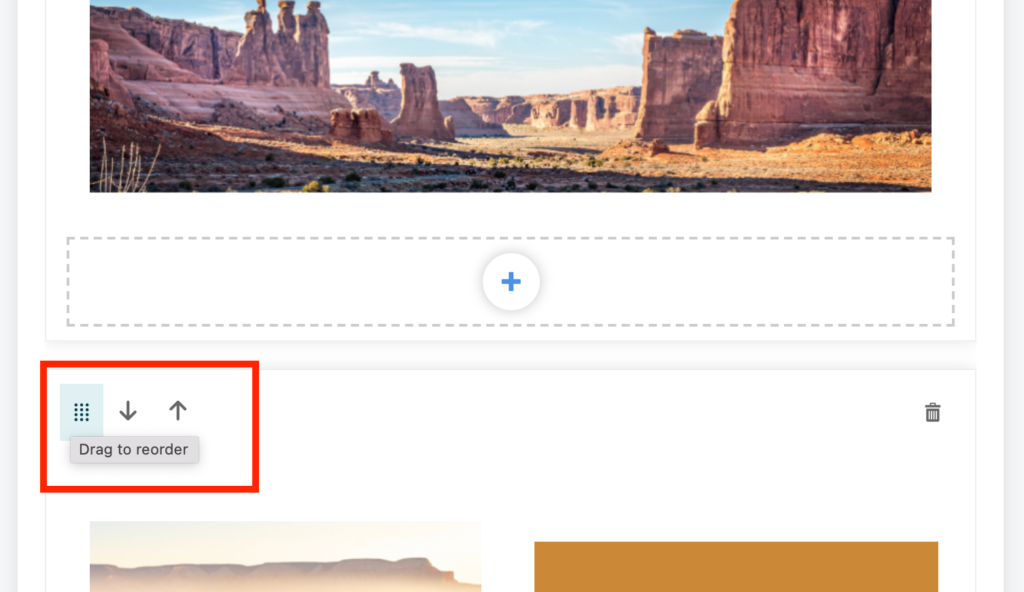
It’s simple to rearrange the content in your email. You can use the drag and drop handle to quickly rearrange, or use the up and down arrows if your content requires you to scroll up and down your screen.
Delete Sections
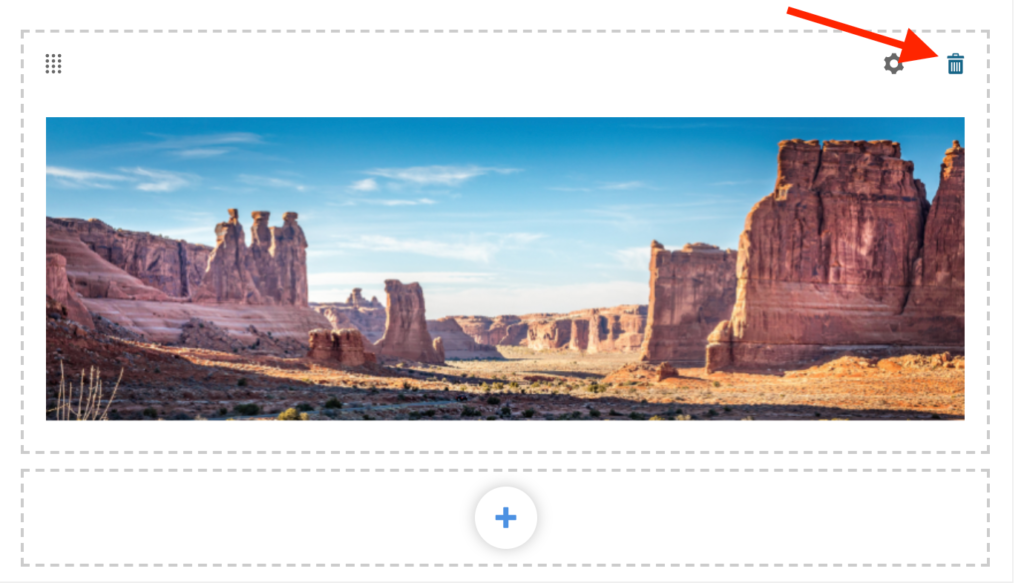
Click the trash can icon in the right corner to delete a section. Be careful using this setting — we haven’t added a confirm warning yet!
Basic Template
We currently offer a basic template option to help you get started building your email. This is quite similar to starting from scratch, but gives you a default section already added to your email to begin your design.
In several months, we will add more template options to quickstart your emails!
Use Your HTML
If you have designed an email template using another tool, you can export the HTML code and use it to build your template in Email Builder. In the Email Builder design board, you have two places where you can input your html.

Review & Send
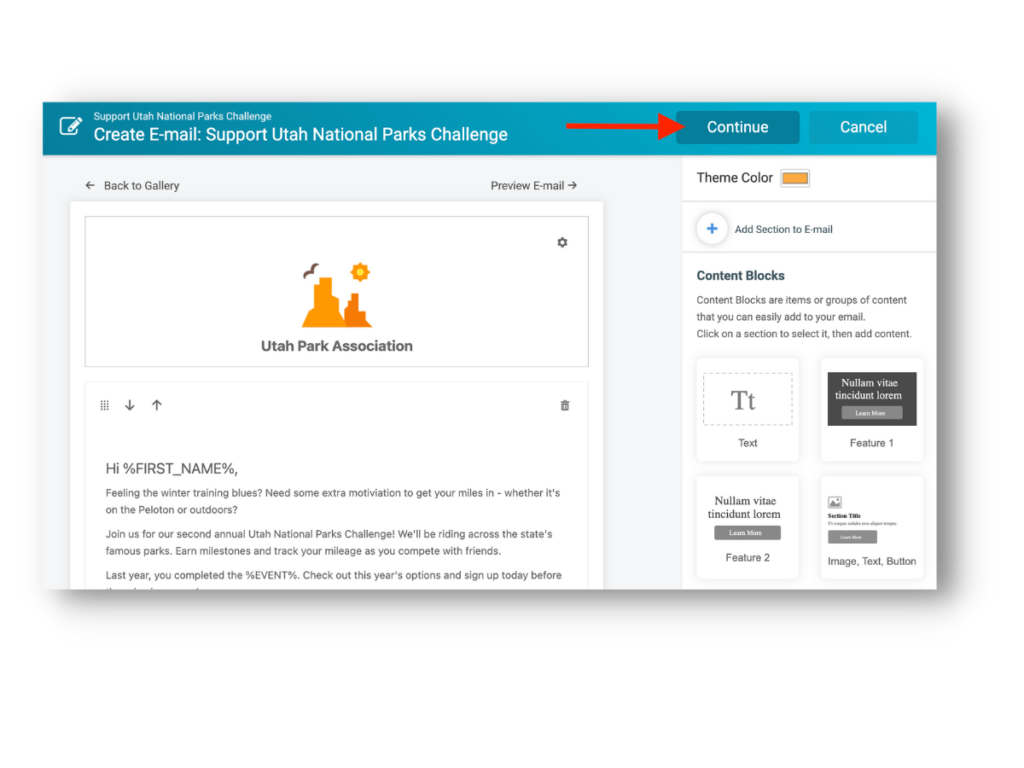
Once you’ve built your email, you can click “Continue.” You will still have time to review and edit your email!
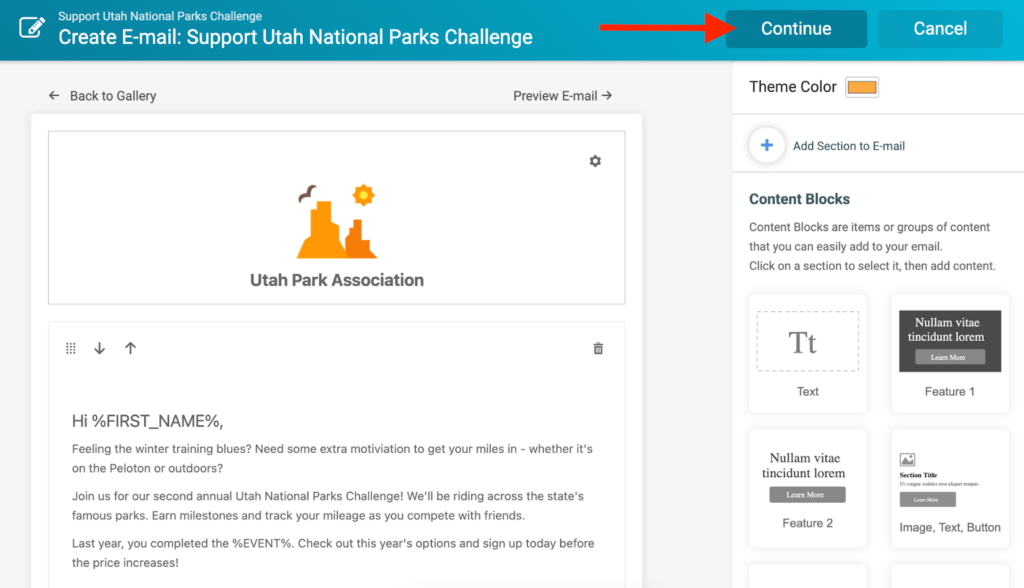
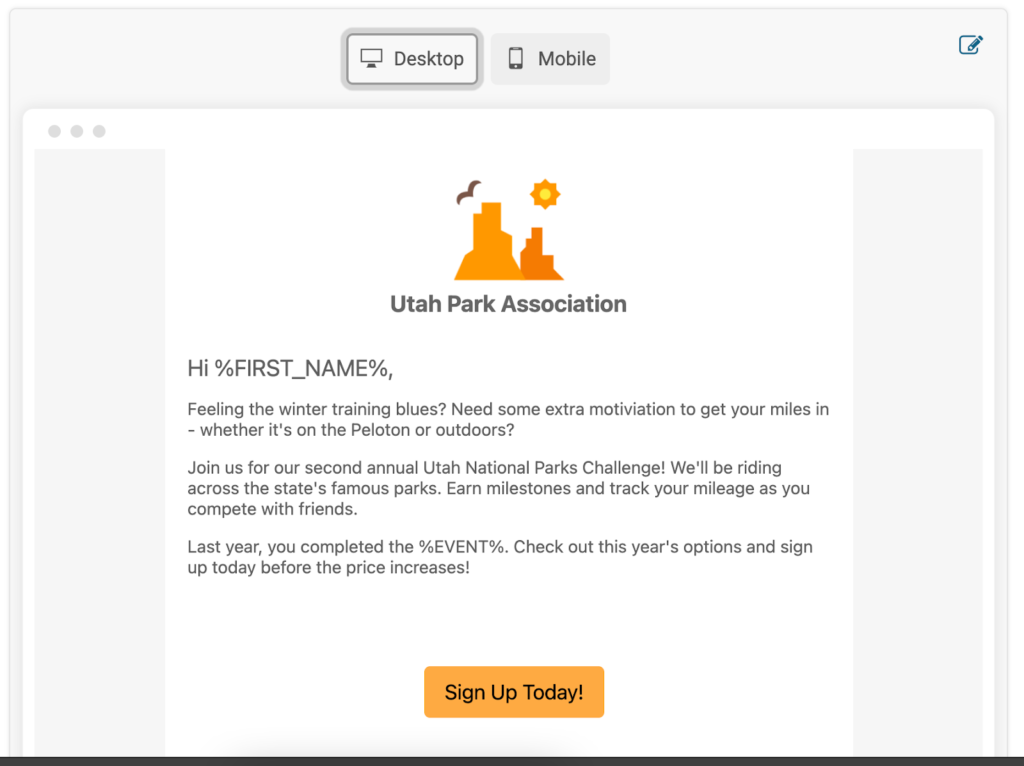
This will return you to the main page. You’ll have a preview of what your email will look like on desktop and mobile. Note: You can also preview the email at any time from the Email Builder.
Click “Review Email” at the bottom of the page when you are ready to send or schedule an email.
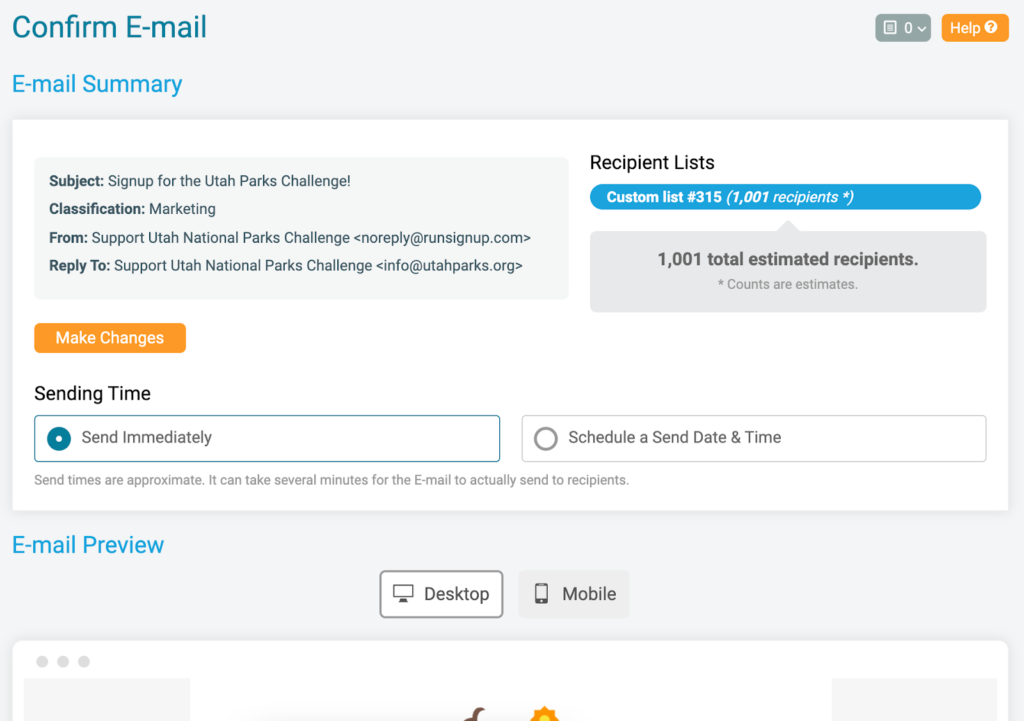
If you are not ready to send your email immediately, schedule a date and time when you would like it to send.

When you confirm your email, you’ll still be able to cancel it.
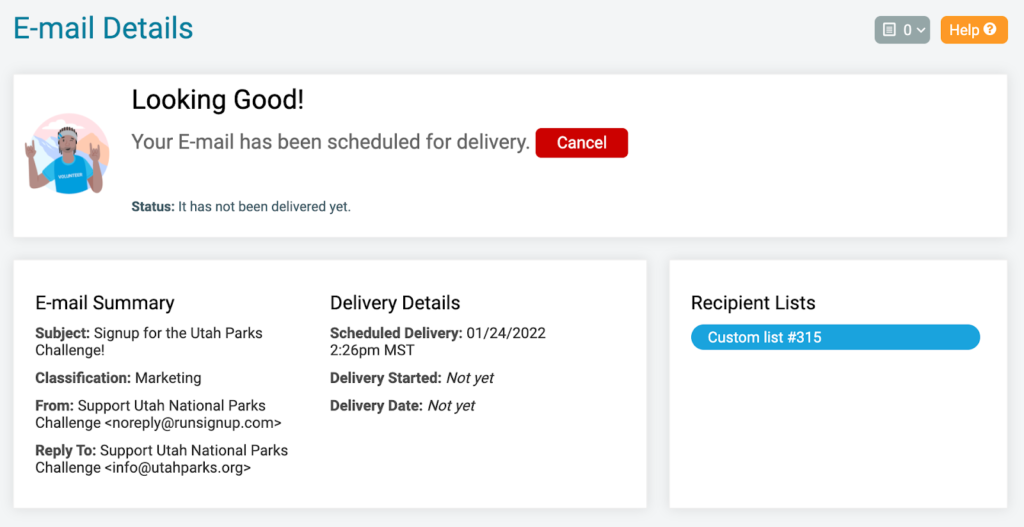
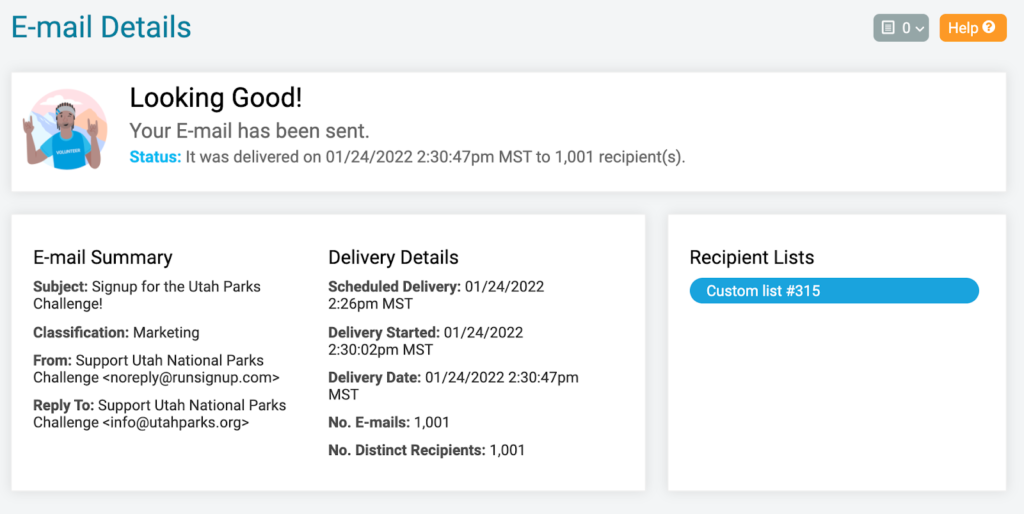
The message will update once the email has been successfully sent.
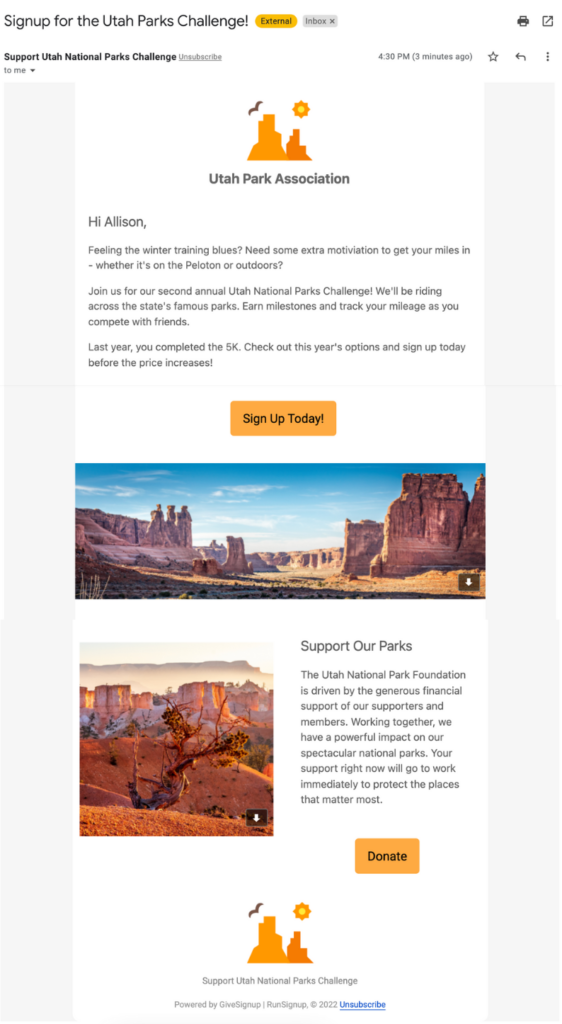
Sent Emails
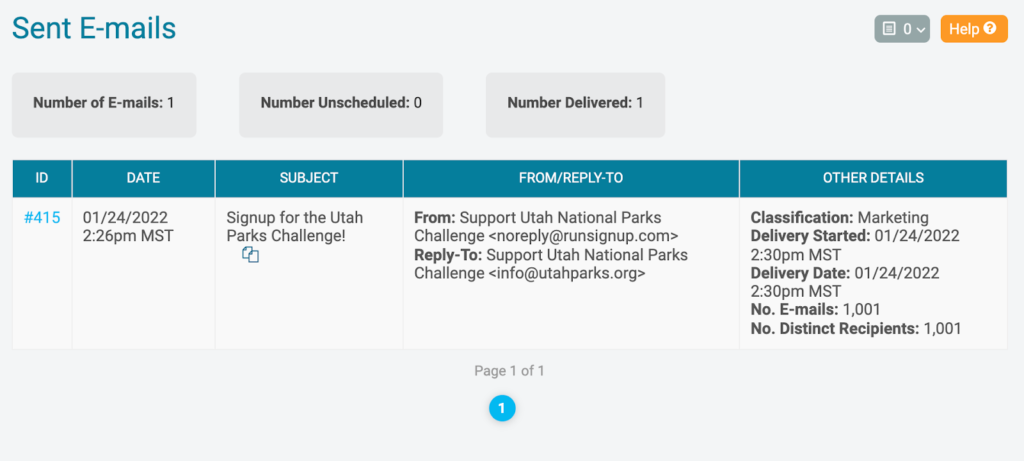
Navigate to “Sent Emails” to view a list of emails that you have sent. You’ll see quick summary statistics at the top, as well as links to more in-depth reports for each sent email.
Templates
We’re also excited to announce the ability to save templates featuring these dynamic new email layouts that can be used for future communications and campaigns. Consistently using these email templates will strengthen your organization’s brand while saving you time and money.

Click on the blue “Create New Template” button.
You will be taken to our Email Builder design board where you can build your email template.
Designing a template is exactly the same process as described in the “Start From Scratch,” “Basic Template,” and “Use Your HTML” sections above. You have all three methods available to create and design your template.
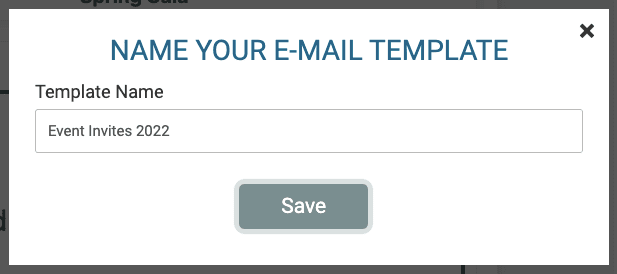
After your design is complete, click “Save” and name your new template.
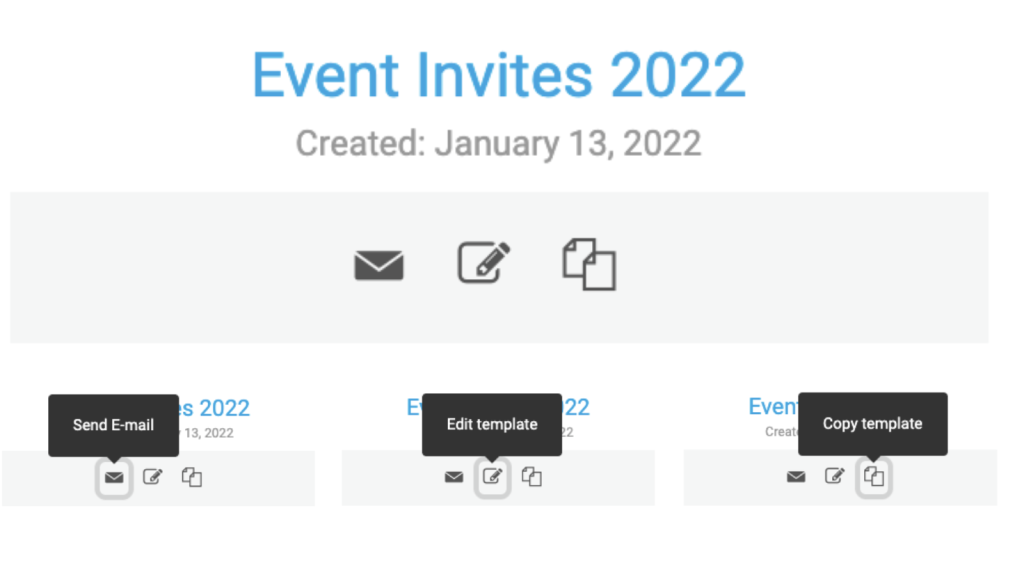
Go to Email >> Email Templates to access your saved email templates. From this page, you can send an email using the template, editing the template, or copying the template to save time and create a new version based on the original.
When you create an email, click on the “Your Saved Templates” tab and select the template you would like to use.
The Email Builder will open, and your template’s content will be pre populated. You can then revise the existing sections and content blocks, or add new ones.
What’s Coming Next
Email Marketing is one of the key platform investments that GiveSignup has made in 2021. Our free email marketing platform is purpose built for events and helps your event save money and build better emails for your peer-to-peer fundraising events and endurance events. In the coming days and weeks, we will be releasing some additional key email features to our next-generation Email Marketing platform:
- Create a contact list from any report. Soon you will be able to create a list from the Participant Report and export to an email list. For example, filter on deferred participants last year in the Participant Report and export to an email list — we’ll automatically include the report columns as replacement tags! This functionality is very powerful and we will continue to add in more places on the platform, such as the Donor and Fundraiser Reports.
- Automated Emails. In two or three weeks, we will add the current automated email functionality to next-generation Email Marketing. This includes incomplete registration, price increases, and registration follow-up emails.
- Next-generation Email Marketing Popup. We are also working on a refreshed Email Marketing Popup that gives you more customization options (i.e., control how many seconds delayed the popup should appear when someone is on your website). We will automate list creation and offer a simple migration path for directors already using the current Email Marketing Popup!
We continue to add more features and functionality to GiveSignup’s free email marketing to offer our customers a free alternative to costly email marketing platforms with several significant advantages:
- Free
- Unlimited contacts, contact lists, and emails sent
- Easy-to-send emails to lists based on GiveSignup reports (e.g., all donors over $100 or all attendees from last year’s gala)
- Easy-to-generate dynamic emails with data directly from GiveSignup — not just first name but specific information, like last year’s donation, links to photos, QR codes for tickets to the festival, etc.
- Integrated tracking to the individual supporter level — being able to see who opened an email and who bought a ticket based on that email
